
How to Create Your First Django Project in 2026 (7 Easy Steps)
how to create first Django project, I still remember the first time I opened my terminal and typed django-admin startproject. I had no idea what half the files meant, and honestly, I broke my project twice before I got a page to load. So if you’re sitting there right now, confused about how to create your first Django project, I want you to know — that confusion is completely normal, and by the end of this post, you’ll have your own working project running on your local server.
I’m writing this the way I wish someone had explained it to me. No jargon dump, no assuming you already know what a virtual environment is. Just a straight walkthrough.
Table of Contents
Why Django Is a Great Place to Start
Before I show you how to create your first Django project, let me quickly tell you why I still recommend Django to almost every beginner I mentor at Nima Academy. It’s a Python framework, which means if you already know a bit of Python, you’re not starting from zero. It also comes with a ton of built-in tools — an admin panel, authentication, and a solid folder structure — so you’re not reinventing the wheel every time you build something.
I’ve tried Flask, FastAPI, and a couple of Node frameworks too, but Django is what I always come back to when I want to build something real, fast.
Step 1: Install Python and Check Your Version
You need Python installed first. Open your terminal and type:
python --versionIf you see something like Python 3.11 or higher, you’re good. If not, grab it from python.org and install it before moving forward.
If Your Are Using Mac OS please Specify Python Version As A Python 3

Step 2: Create a Virtual Environment
This step trips up a lot of beginners, but it’s just about keeping your project’s packages separate from everything else on your computer. I never skip this, even for tiny practice projects.
python -m venv env #First Command
virtualenv env #Secound Command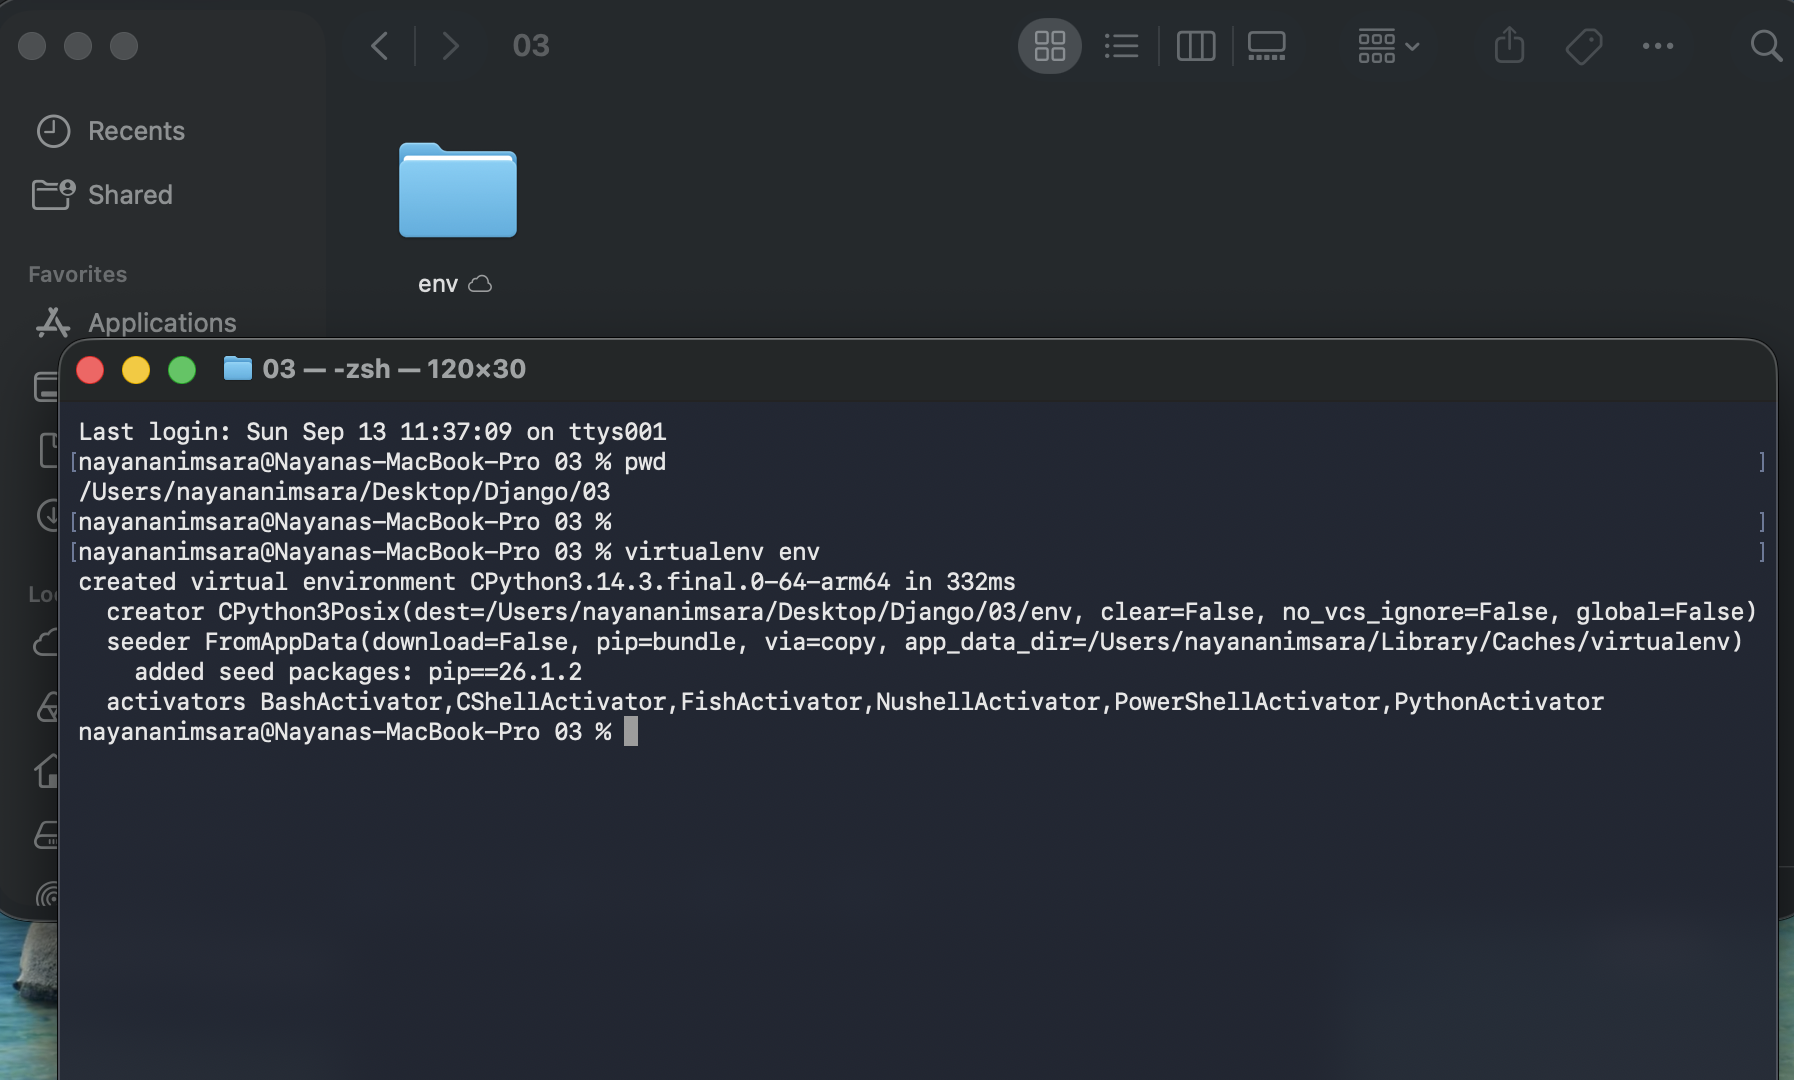
Then activate it:
- Windows:
env\Scripts\activate - Mac/Linux:
sourceenv/bin/activate

You’ll know it worked when you see (myenv) show up at the start of your terminal line.
Step 3: Install Django
With your virtual environment active, run:
pip install django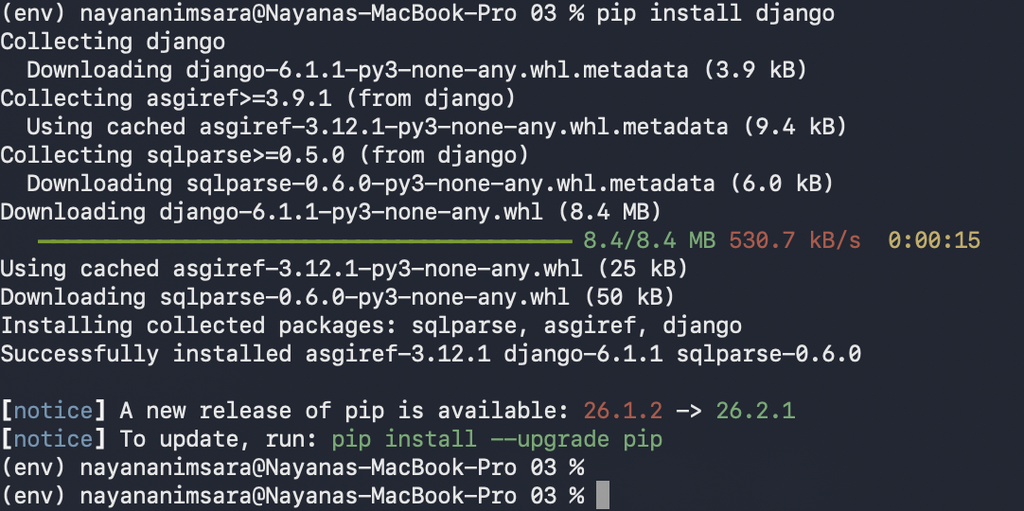
I usually check the version right after, just to be safe:
django-admin --version
Step 4: Create Your First Django Project
Here’s the actual moment you’ve been waiting for. Run this command:
django-admin startproject myfirstprojectMove into that folder:
cd myfirstprojectIf you open the folder now, you’ll see a few files — manage.py, and a subfolder with the same project name containing settings.py, urls.py, and a couple of others. Don’t worry about understanding every file today. I didn’t either, and it clicked over time.
If You Need Create Your Django Project In Your Root Folder Please Follow Bellow Command Im Using Generally That Secound Method
django-admin startproject myfirstproject .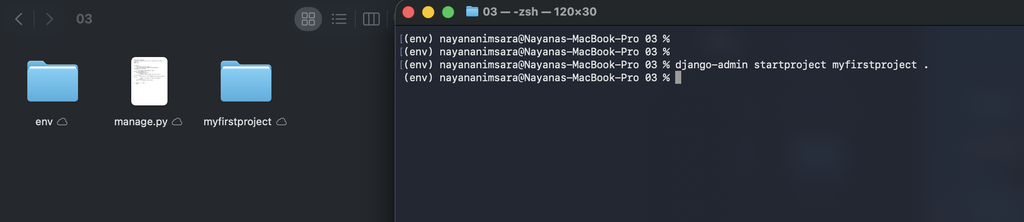
In This Method You No Need To Open FolderProject Folder Manage.py create in your root Project DIR , you’ll see a few files — manage.py, and a subfolder with the same project name containing settings.py, urls.py, and a couple of others. Don’t worry about understanding every file today. I didn’t either, and it clicked over time.
Step 5: Run the Development Server
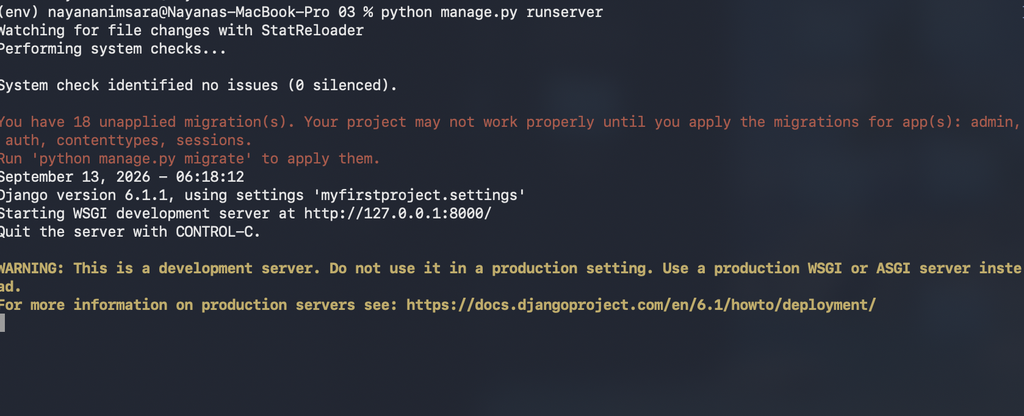
This is the part that makes it feel real. Type:
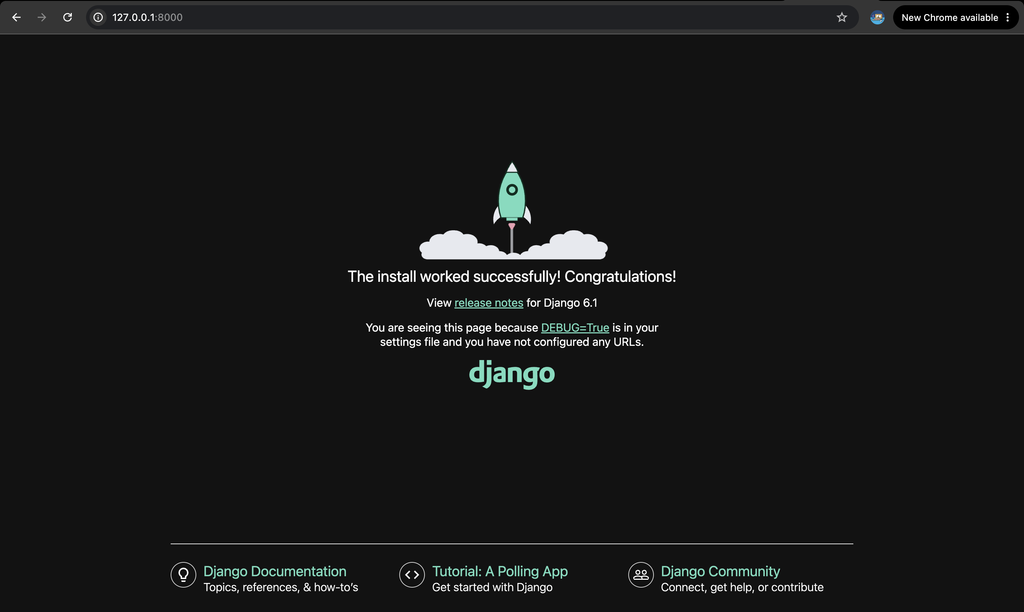
python manage.py runserverNow open your browser and go to http://127.0.0.1:8000/. If you see Django’s welcome rocket page, congratulations — you just created and ran your first Django project. I still get a little kick out of seeing that page, even now.
Step 6: Create Your First App
A Django project can contain multiple apps. Think of an app as one feature of your website — like a blog, a store, or a contact form. Let’s create one:
python manage.py startapp blogThen open settings.py and add 'blog' to your INSTALLED_APPS list. This tells Django to actually use the app you just built.
Step 7: Make Your First Migration
Django uses something called migrations to set up your database tables. Run these two commands:
python manage.py makemigrations
python manage.py migrate
You’ll see a bunch of lines confirming tables were created. That’s Django quietly setting up a SQLite database for you in the background — no manual database setup required, which honestly saved me hours when I was learning.
A Few Things I Wish I Knew Earlier
- Always activate your virtual environment before running any Django command, or you’ll get confusing errors.
- Keep
manage.pyin the root folder — don’t move it, I learned this the hard way. - Use
python manage.py createsuperuserearly on so you can explore Django’s built-in admin panel. It’s one of the most underrated parts of the framework.
If you want to go deeper into how virtual environments actually work under the hood, I’ve written a separate breakdown of that on Nima Academy — worth a read once you’re comfortable with the basics here. And for anything official, the Django documentation is genuinely well written and worth bookmarking.
Final Thoughts
Creating your first Django project isn’t complicated once you break it into small steps. The commands look intimidating the first time, but after you’ve typed startproject and runserver a few times, it becomes muscle memory. I’d rather you build five small broken projects than watch ten tutorials without touching your keyboard.
So open your terminal, run through these steps again on your own, and see what you can break — and then fix. That’s genuinely how I learned, and it’s how most developers I know learned too.
If you get stuck anywhere, drop a comment below. I read every one of them.